by
by You can detect a hard drive error by running a chkdsk scan in Windows 10. In this guide, we will show you how to repair and resolve hard drive issues using chkdsk.
Hard drive errors are among the worst problems you can face on a Windows 10 PC. When your hard drive has problems, it can lead to hardware failures, performance issues, system crashes, and power outages. One way to avoid hard drive surprises is to run a Chkdsk scan and repair drive issues in Windows 10.
It’s best to be proactive and avoid any reader errors before they happen. Many Windows 10 users ignore the Chkdsk analysis feature built into the Microsoft platform. When Windows 10 runs a Chkdsk scan, it allows you to troubleshoot issues found on your file system.
Above all, the utility lets you easily know how to repair hard drive in Windows 10.
There are other important things to consider about the Chkdsk scan tool:
With the utility, you can also repair an external hard drive.
Chkdsk is an older Windows tool, so it is also available to check for disk issues in Windows 7. However, this guide focuses on Windows 10.
Works for SSDs with Chkdsk SSD scan.
Checkdisk (Chkdsk): Disk errors Windows 10 can fix
The chkdsk utility is one of the most useful Windows 10 utilities, allowing you to scan your hard drive and repair it. Knowing how to repair Windows 10 hard drive with Chkdsk is a fundamental skill that all PC users should have.
In this guide, we will show you how to run the Check Disk utility and deal with issues caused by improper removal of external drives, improper system shutdown, and other issues.
When you run a Chkdsk scan on Windows 10, you may see errors for the following issues and fix them:
Directory errors
Bad sectors
Lost clusters
There are two ways to run a Chkdsk scan on Windows. The first is to use File Explorer and the second is the Check disk Windows 10 command prompt. Since the File Explorer method is simpler, we recommend it, although both methods are explained below. below:
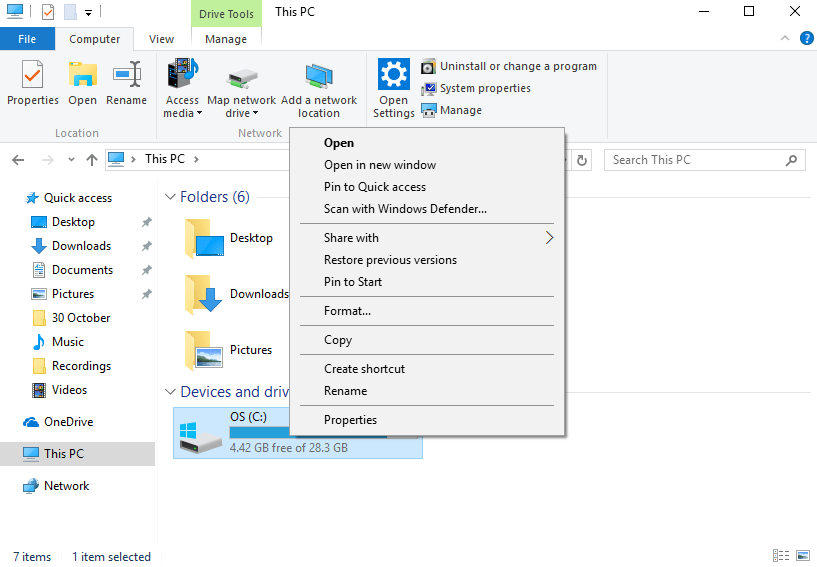
To start, open a new File Explorer window (click Windows key + E) then click This PC. Right-click on the drive that you wish to scan – most commonly this will be your C: Drive or D: Drive – then click Properties.
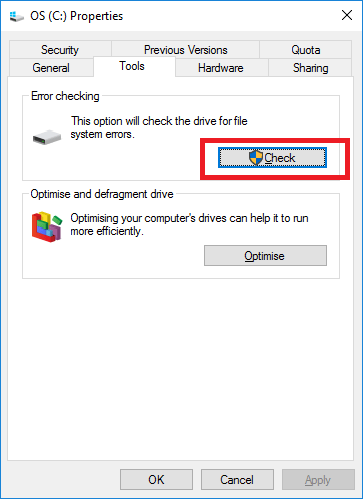
The Properties window for the selected drive will now open. Here, click the Tools tab and then click Check under the Error checking section.
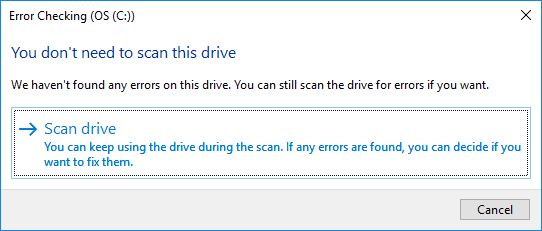
If your PC thinks everything is running smoothly, it’ll show a window stating that you don’t need to scan the drive at all. However, if you’d prefer to run a CHKDSK scan, you can proceed by clicking Scan drive below this.
Want some more help with your hard drive? Our friendly tech team can help you with one-to-one support on a range of tech issues. Find out more here.
Don’t worry, you can’t do any damage to your PC by running this scan process.
The CHKDSK function will begin its checks. Depending on the size of your selected drive, and the amount of data stored on it, this process could take anything from a few minutes to half an hour.
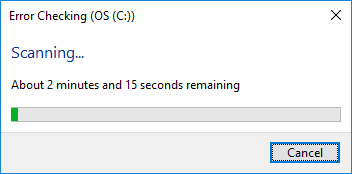
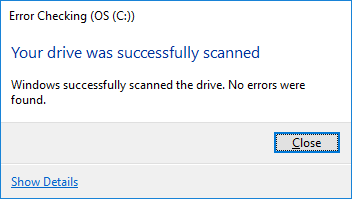
If all is well, you’ll receive the good news that the drive has been completed and no errors were found. However, if the CHKDSK scan does find errors, it will attempt to fix what it can.
Using Chkdsk with Windows 10 Command Prompt
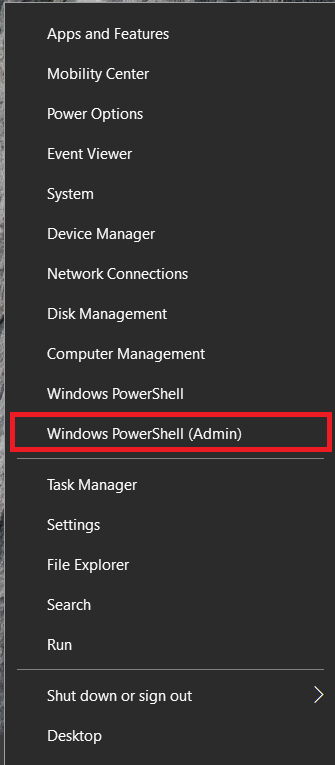
After right clicking on the Start button, you open the “Windows PowerShell” with administrator rights.
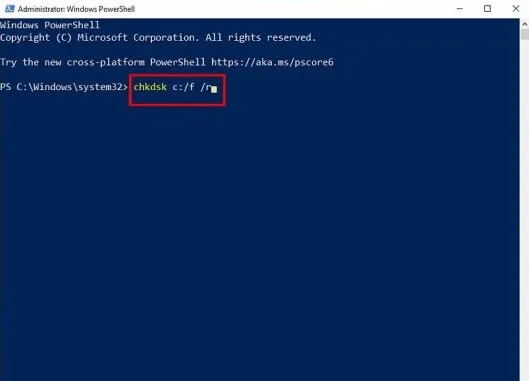
To check system drive C: enter the command
Windows 10 – CHKDSK – Confirm
or replace “c:” with the drive letter of another drive. You use the / f parameter to check and repair the file system on the drive and the / r parameter to check for bad sectors and restore lost data blocks if necessary.
If the drive is currently in use by important programs, you must first separate it from these tasks with the letter “Y” or “O”. However, this can lead to data loss, which is why you should quit these programs first.

If the drive to check is your system hard drive C: you must also schedule the error scan for the next system by confirming with the letter “Y” or “O”, as this is not possible with a Windows 10 system running.
Before the next boot process, your drives are first checked for errors and the corresponding result is displayed.